A hole can appear in clothing from time to time.
But don’t toss them just yet. You can save your favorite outfits even if you don’t know how to sew.
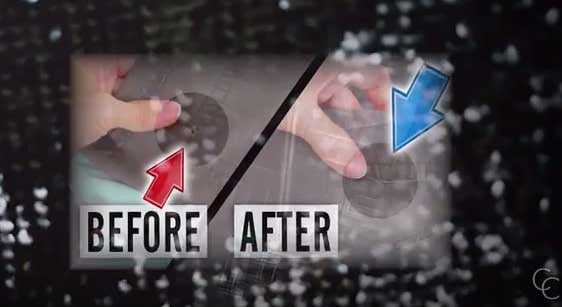
In fact, even if you can sew, you might want to opt for this method for little holes since it avoids the risk of knobby and noticeable stitches. Once you’re on the lookout for these annoying holes, you might find them in more clothing than you think.
Fortunately, once you master the technique, you’ll need only a few minutes to fix each pinprick.
What Causes a Hole in Clothing
These pesky little holes can appear for many different reasons. Moths are easy to blame, but they are not the only culprits. Regular wear and tear can cause pinpricks, as well as snags from common items and accessories. These can include:
Zippers
Bras
Belts
Your washing machine
Chlorine bleach
Snags on rough surfaces
How to Prevent Holes
The location of the holes may indicate the culprit. For instance, holes at the bottom of shirts can come from belt buckles that rub or catch the material. If so, skip the belt, change its position regularly, or smooth the rough edges with sandpaper. If you tuck your shirts into jeans, the zipper could be responsible for holes. But zippers can also damage clothing in the washing machine. Therefore, zip up jeans, hoodies, and the like before washing them to prevent them from snagging onto other materials. Similarly, close bras before washing them to stop the metal clasps from hitching onto other clothing. Alternatively, keep the bras separate in a washing bag, especially if the bras tend to unclasp. [1]
While on the subject of washing machines, other bad habits could cause a hole in the clothing. For instance, you should avoid overloading the machine; it makes items with zippers, buttons, etc., more likely to snag. So don’t overstuff the washer, and turn garments with beads, buttons, or other decorations inside out.
Also, keep weak materials like cotton and silk separate from sturdy pieces like sheets and towels. Instead, make sure silk and other delicate items use a low spin cycle. Plus, be careful with chlorine bleach; used incorrectly or in large amounts can put holes in clothing. So exercise caution or switch to environmentally friendly alternatives like vinegar, citric acid, or baking soda.
Moths are also common causes of holes, especially in animal materials like wool, silk, and leather, but moths would also snack and steal from other cloths. So you can use pheromone traps to combat male moths, and place dried lavender in mesh bags or use mint or lavender essential oils to repel the rest. If you’re fighting a bad infestation, wash your clothes in warm water and clean the closet with vinegar.
Lastly, be mindful of rough surfaces like brick, exposed nails, wood, and stone. Rubbing or bumping against them may cause snags. You may not notice these holes at first, but they may unravel and worsen after washing or further wear and tear. So if you have these kinds of surfaces around your house, consider smoothing them or covering them to protect accidental tearing. [2]
How to Repair Clothes Without Sewing
Before you start fixing any holes, you will need the following:
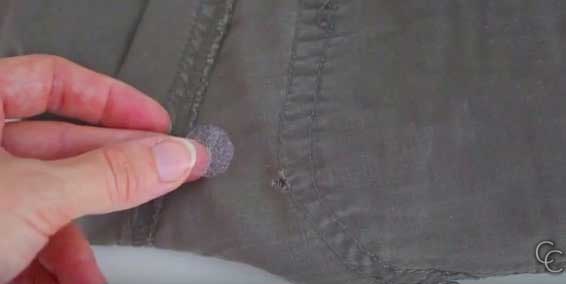
- Clothes with holes measuring 5 mm or less
- An Iron
- Fusible bonding web
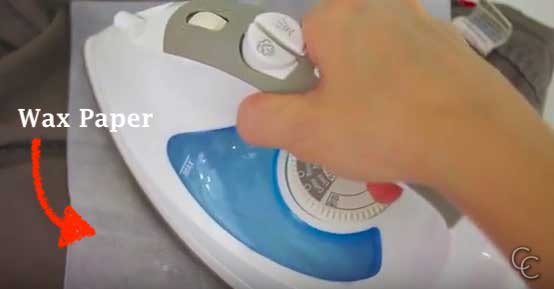
- A large piece of wax paper
Directions:
1. Turn the damaged article of clothing inside out and place it on the ironing board, the hole facing out.
2. Cut a small piece of fusing web. It should be slightly bigger than the hole you’re trying to repair.
3. Gently push both sides of the hole together (so that it looks like the hole is gone) and place the fusing web over the hole. Place the wax paper over the same spot. You can purchase fusing web at places like Walmart, fabric or craft stores, and Amazon.
4. Next, set your iron onto its “wool” setting and place it onto the wax paper. Do not move the iron or press on it for about 10 seconds. Remove carefully.
5. Finally, pick up the piece of clothing and turn it right-side-in to examine the hole. If it hadn’t closed smoothly, use your fingers to close the hole like in step two. Repeat steps three and four with the iron until the clothing looks good as new. It may take a few tries to master the method, but when you succeed, you’ll notice immediately that the hole looks gone.